Document Capture
In this section, you will find all the necessary information for using and integrating the Unico IDCloud SDK into your Web applications for document capture
This guide has been designed to help you implement the Web SDK quickly and easily. Below, you will find a step-by-step process for the entire integration. After that, if you wish to customize the experience, be sure to check the Web Customization section.
Available Document Frames
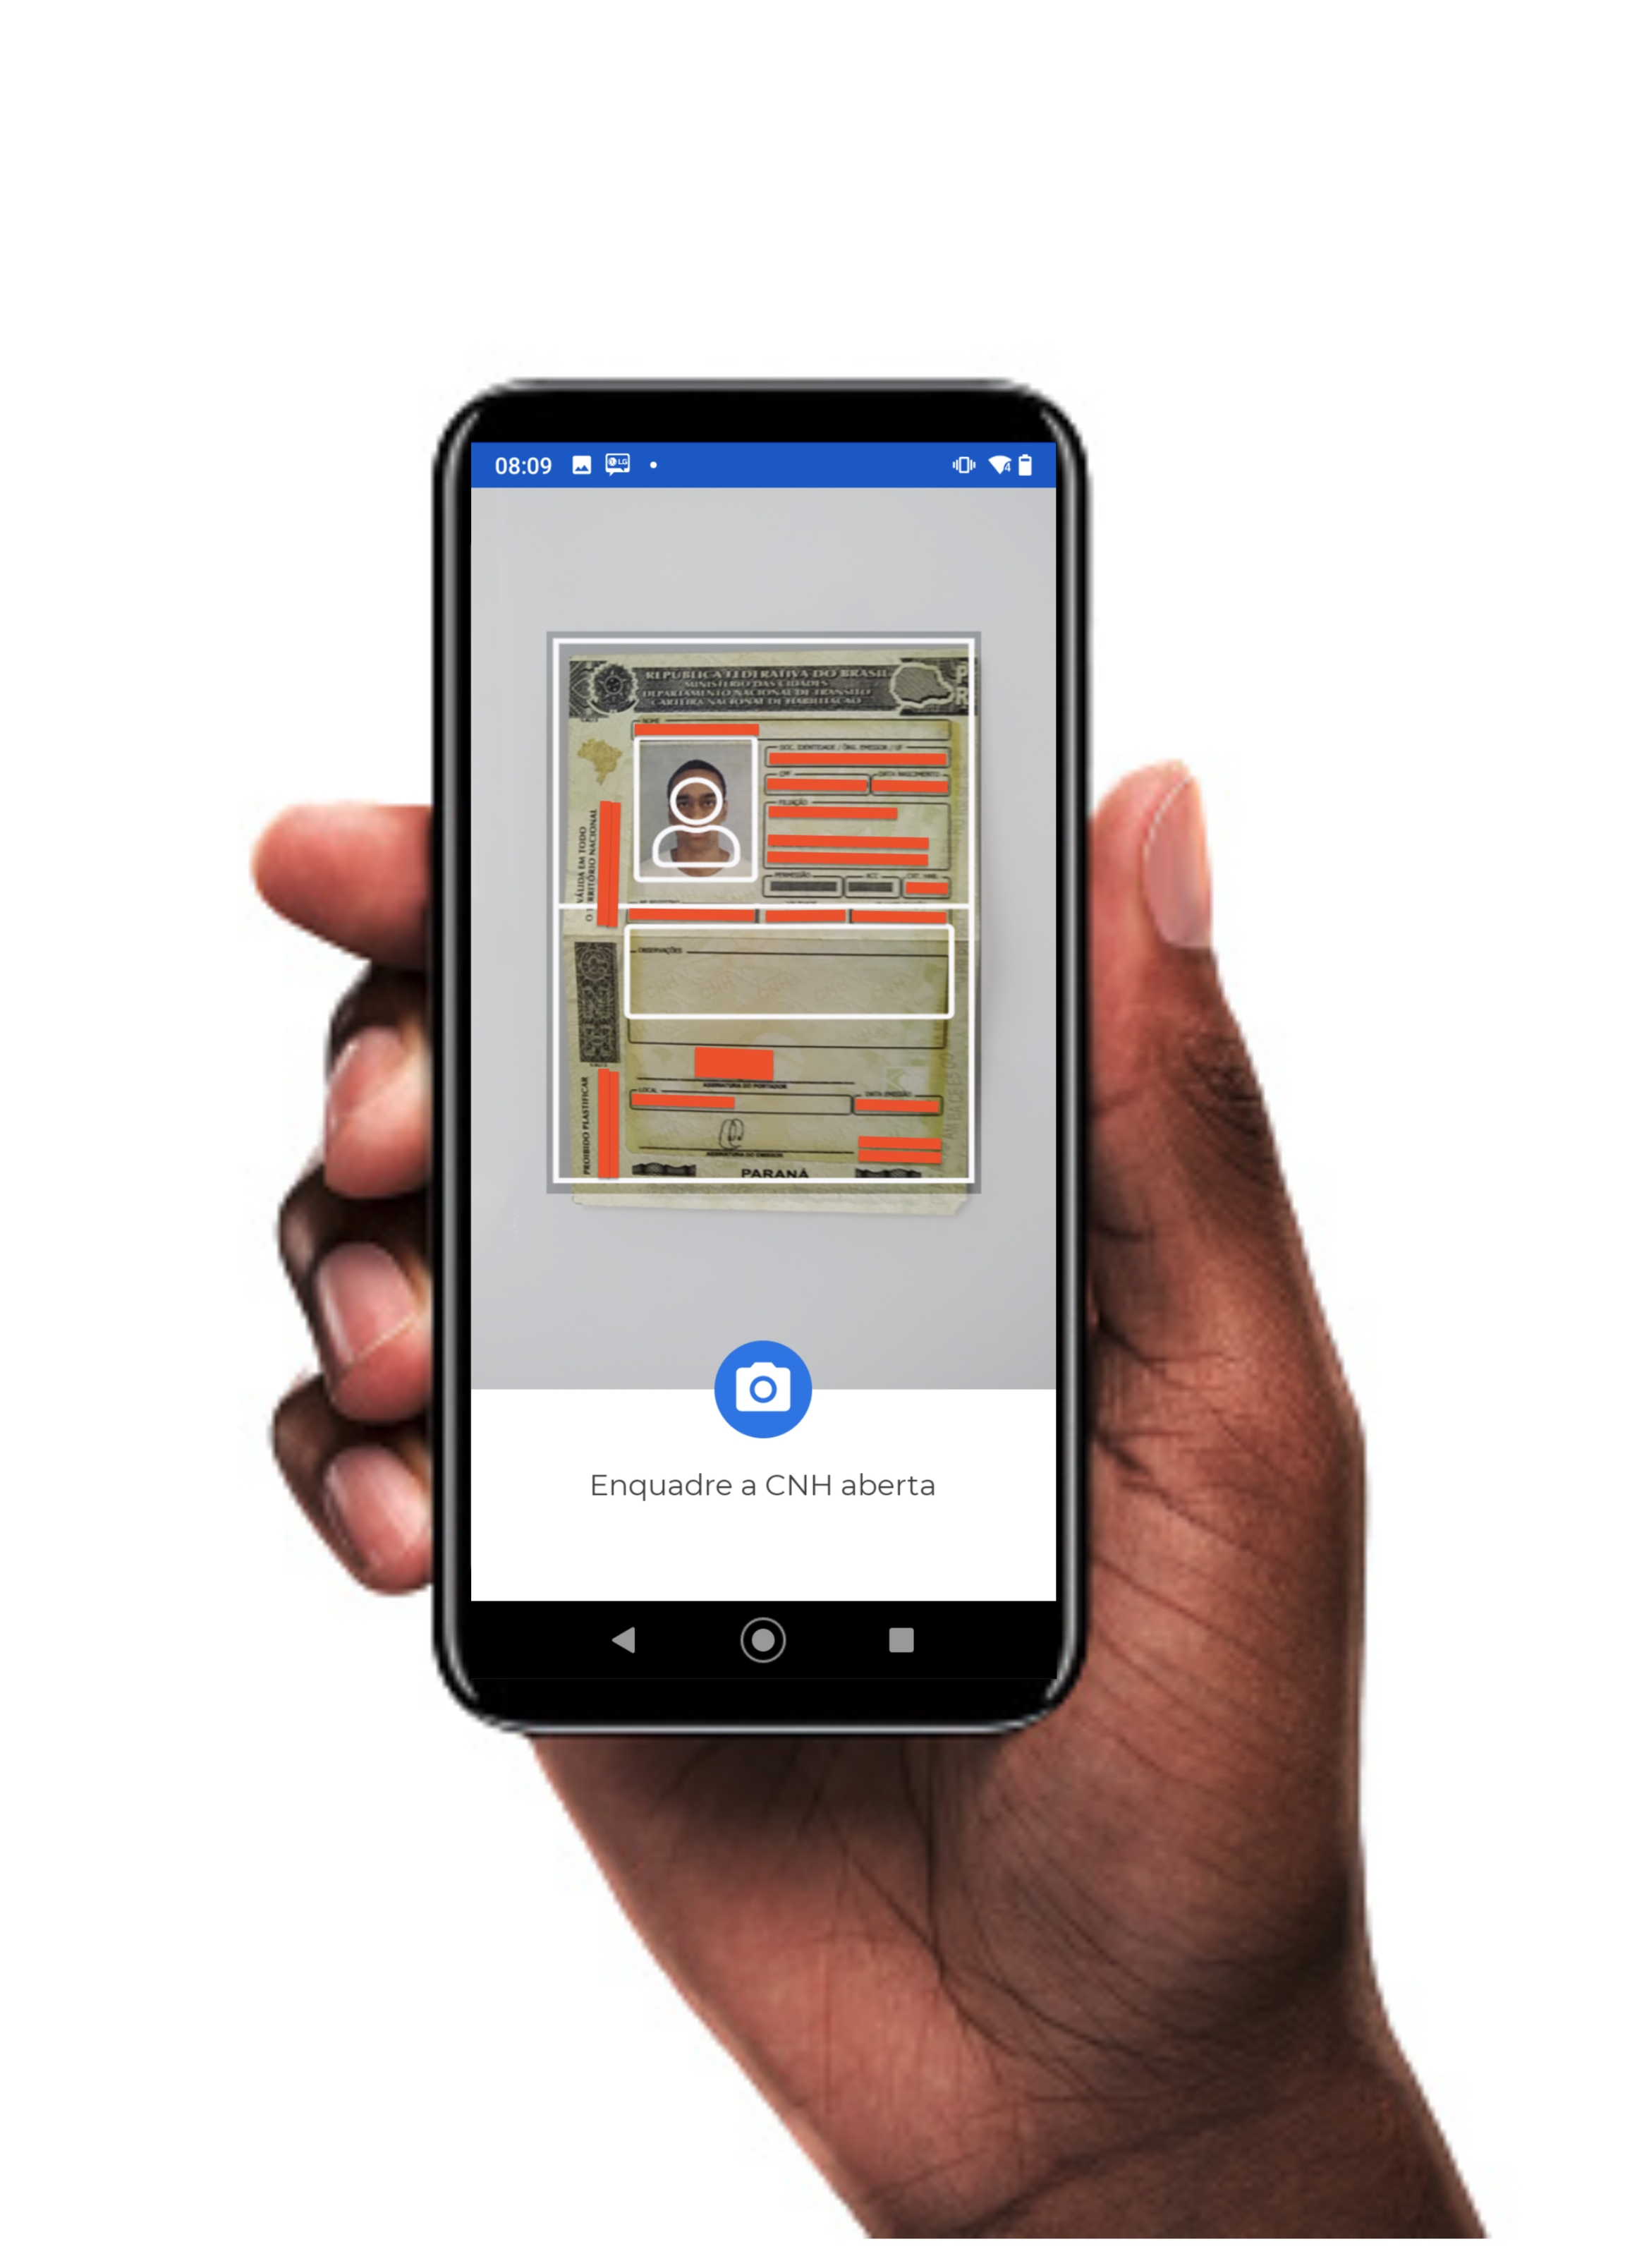
In this camera mode, there is a capture frame to assist the user in positioning the document correctly. Once the document is positioned properly, the user must click the button to capture the document photo.
The SDK does not perform any kind of validation on what is being captured.
In this camera mode, it is possible to capture the following documents:
CPF: Capture the front of the CPF;
CNH: Capture the open CNH;
CNH Front: Capture the front of the CNH;
CNH Back: Capture the back of the CNH;
RG Front: Capture the front of the RG;
RG Back: Capture the back of the RG;
Others: Capture any other document.
Initializing the SDK
To get started, you need to perform 2 simple steps in your project:
Instantiate a new Builder:
const unicoCameraBuilder = new UnicoCheckBuilder();Specify the path for additional files (if added to your project):
unicoCameraBuilder.setResourceDirectory("/resources");Configure Frame Size
It is recommended that you configure the size of the frame within your application to optimize the capture area within your WebApp. Below is how to make this configuration for Web Desktop or Mobile.
In the Web Desktop versions, it is possible to restrict the size of the frame so that it doesn't use the entire dimension of your WebApp. To do this, simply wrap the frame (id="box-camera") in another HTML tag, as shown in the example below:
<div class="container">
  <div id="box-camera"></div>
</div>
Ideally, you should aim to maintain a proper ratio between height and width, as this will make it easier to frame the user's face. Here's an example:
.container {
  width: 800px;
  height: 600px;
  position: relative;
}
Following the example above, the frame respects the size of the "parent" element, in this case represented by the container. This way, you have the flexibility to implement the frame in the most convenient way for your application (e.g., inside a modal).
Tests involving resizing the screen through your browser's developer mode will not work as expected. It is recommended to perform this type of test by resizing your browser window instead.
Implementing the Callback functions
One of the objects that must be passed as a parameter to the method responsible for rendering the capture frame is the callback object. This object should contain callback functions for success and error cases, as exemplified below:
  const callback = {
    on: {
      success: (obj) => {
        console.log(obj.base64);
        console.log(obj.encrypted);
      },
      error: (error) => {
        console.error(error)
      },
    }
  };
This object is mandatory, and if not properly implemented (covering all success or error events), it raises an exception, which, if not handled, is displayed in the user's console.
Configure and Start Camera
To start the camera with the settings made so far, it is necessary to create an instance of the builder through the build() method.
const unicoCamera = unicoCameraBuilder.build();Then, with the camera "assembled," the capture mode of the camera must be configured.
The camera preparation is carried out using the prepareDocumentCamera() method, available from the builder. This method takes two parameters:
The UnicoConfig class obtained in this step;
The type of document to be captured, which are:
DocumentCameraTypes.CPF
Capture the front of the CPF
DocumentCameraTypes.CNH
Capture the open CNH
DocumentCameraTypes.CNH_FRENTE
Capture the front of the CNH
DocumentCameraTypes.CNH_VERSO
Capture the back of the CNH
DocumentCameraTypes.RG_FRENTE
Capture the front of the RG
DocumentCameraTypes.RG_VERSO
Capture the back of the RG
DocumentCameraTypes.RG_FRENTE_NOVO
Capture the front of the new RG
DocumentCameraTypes.RG_VERSO_NOVO
Capture the back of the new RG
DocumentCameraTypes.OTHERS("descrição")
Capture any other document
This method returns a promise that, when resolved, returns an object that is used to actually open the camera through the open method, which takes as a parameter the callback functions configured in the previous step.
Below is an example using the CNH capture:
Using the UnicoConfig class:
  const config = new UnicoConfig()
    .setProjectNumber("<YOUR_PROJECT_NUMBER>")
    .setProjectId("<YOUR_PROJECT_ID>")
    .setMobileSdkAppId("<YOUR_MOBILE_SDK_APP_ID>")
    .setHostname("<YOUR_HOSTNAME>")
    .setHostInfo("<YOUR_HOST_INFO>")
    .setHostKey("<YOUR_HOST_KEY>");

  unicoCamera.prepareDocumentCamera(
    config,
    DocumentCameraTypes.CNH
  ).then(cameraOpener => {
    cameraOpener.open(callback);
  }).catch(error => {
    console.error(error);
    // confira na aba "Referências" sobre os erros possíveis
  });
If you need to capture a document for which there is no specific frame (e.g., RNE, among others), use the If you need to capture a document that does not have a specific frame (e.g., RNE, among others), use the frame DocumentCameraType.None, which will provide you with a generic, rectangular frame that can be used to guide any capture.
Making a POST Request to the Client API
Capturing the images is just the first part of the journey. After capturing the image, it is necessary to send the base64 generated by the SDK to the REST APIs of by Client. Learn more in the CreateProcess section of by Client.
Still need help?
Didn't find something or still need help? If you're already a client or partner, you can reach out through our Help Center.
Last updated